The Candela3D-CAD plugin is a companion tool for the main Candela3D program, fully available to users free of charge. The Candela3D-CAD plugin offers numerous practical functions and does not rely on the Candela3D software to run. Certain tools can significantly enhance everyone's work efficiency, and we highly recommend them.
The previous articles "Candela3D-CAD | Free Use - Practical CAD Plugins (1)" and "Candela3D-CAD | Free Use - Practical CAD Plugins (2)" have introduced some of the primitive processing functions. This article is the third part: Other Functions. At the end of the article, there are download links, installation, and uninstallation videos for using the plugin.
(1) AlignArrays: After using the "Transform Polygons to Arrays (Poly2block)" command, the transformed array blocks may appear unevenly arranged in rows and columns. Therefore, it is necessary to use the "Align Arrays" command to align the transformed array blocks in rows and columns.
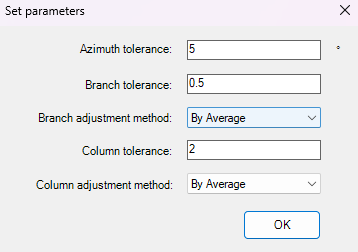
"Azimuth tolerance": Arrays will only align when the selected array azimuth matches the preset parameters.
"Row Tolerance": The software will simulate the generation of row centerlines (purple) for arrays. When the spacing between these row centerlines reaches a preset value, the software will recognize that two arrays are in the same row.
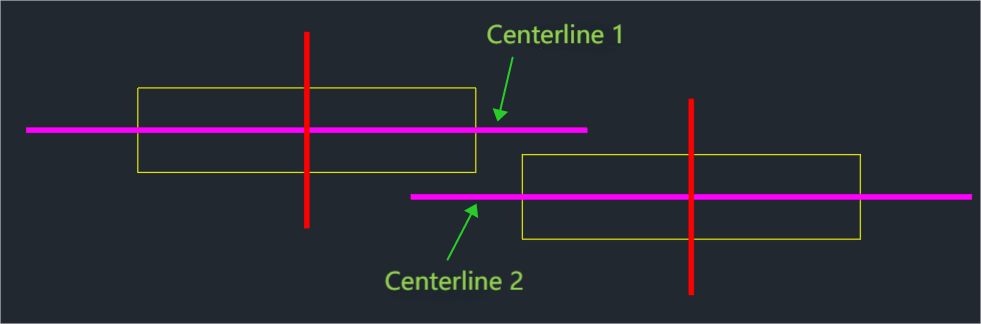
"Branch Adjust Type": Offers three adjustment options: "Average", "Top", and "Bottom". As illustrated, when using the "Average" method, the software calculates the average position of Centerline 1 and Centerline 2, and uses this as the centerline for aligning the subsequent arrays; when using the "Top" method, Centerline 1 becomes the centerline for aligning the subsequent arrays; when using the "Bottom" method, Centerline 2 becomes the centerline for aligning the subsequent arrays.
The determination and adjustment logic for "Column Tolerance" and "Column Adjust Type" are similar to those mentioned above. The determination is based on the virtually generated centerline (Red) of the square array.
(2) BlockDeduplication: This command primarily serves to merge multiple rectangular blocks with the same size but different block names in the drawing into a single rectangular block.
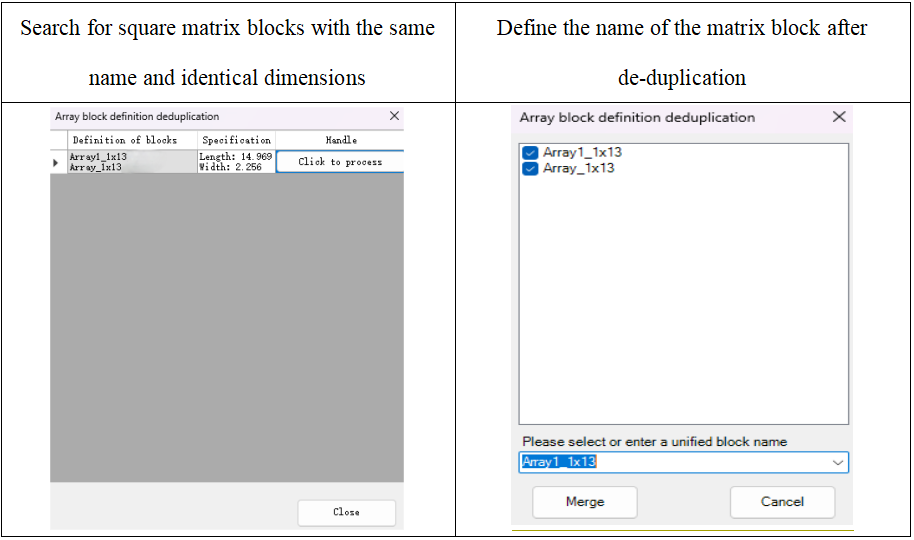
After executing this command, the software will automatically identify the matrix blocks with the same size but different names in the drawing, and arrange them in the same list row. Click the "Process" option, select the matrix blocks that need to be merged, and enter a unified new name. Then click the "Merge" button to complete the merging operation of the matrix blocks.
(3) Replace array: The piling work at the construction site has been completed, but the size of the array needs to be adjusted (usually from a larger array to a smaller one). At this time, you can use this command to replace the array blocks based on the piling situation on site.
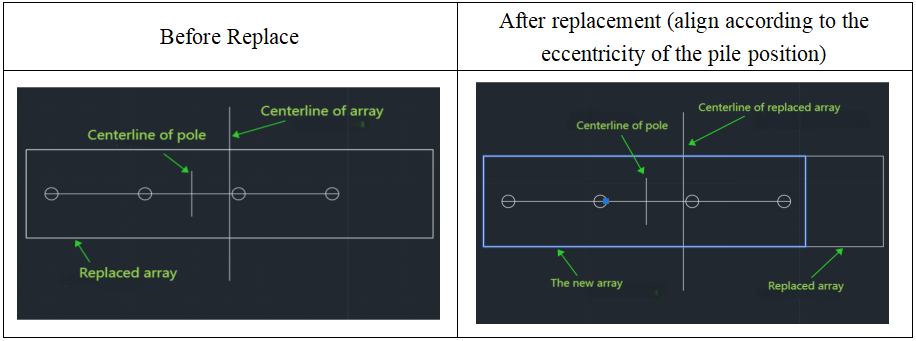
The replace types include "Align Left", "Align Right", and "Align Eccentrically by Pile Position". "Align Left" refers to the condition where the leftmost edge of the replaced array remains consistent with the leftmost edge of the original array. "Align Eccentrically by Pile Position" means that the software automatically determines the offset of the pile position center relative to the edge of the original array. If the offset is to the left, the leftmost edge of the replaced array aligns with the leftmost edge of the original array; if the offset is to the right, the rightmost edge of the replaced array aligns with the rightmost edge of the original array.
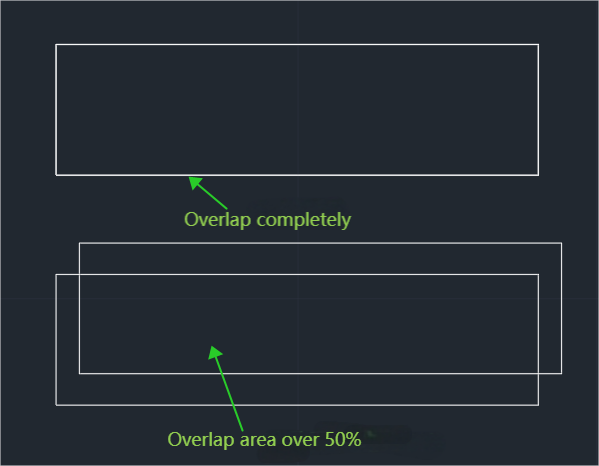
(4) FilterOverlapArray: This command primarily serves to Find overlapping or intersecting arrays in the drawing.

(5) Getboundary: This command is used to Generate the outer contour lines of the selected graphics. The contour lines will be generated on the Currently active Layer. This command is primarily applicable for generating the outer contour lines of power blocks during reverse import.

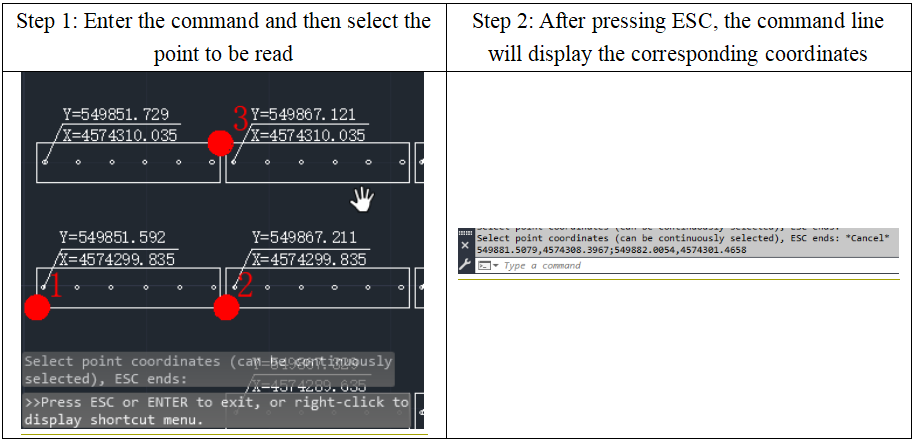
(6) ContinuousReadPoint2d: This command is used to continuously read the 2D coordinates of the selected point.
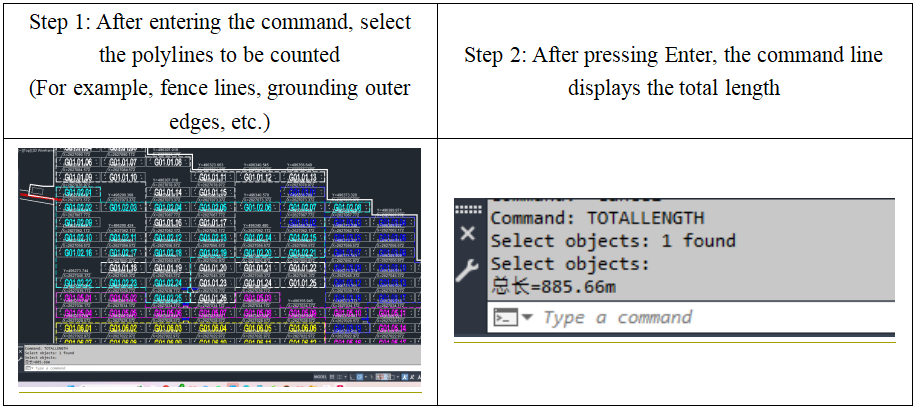
(7) TotalLength: This command is used to calculate the length of the selected polylines.
(8) undogroup: This command is used to undo all groupings within the drawing.
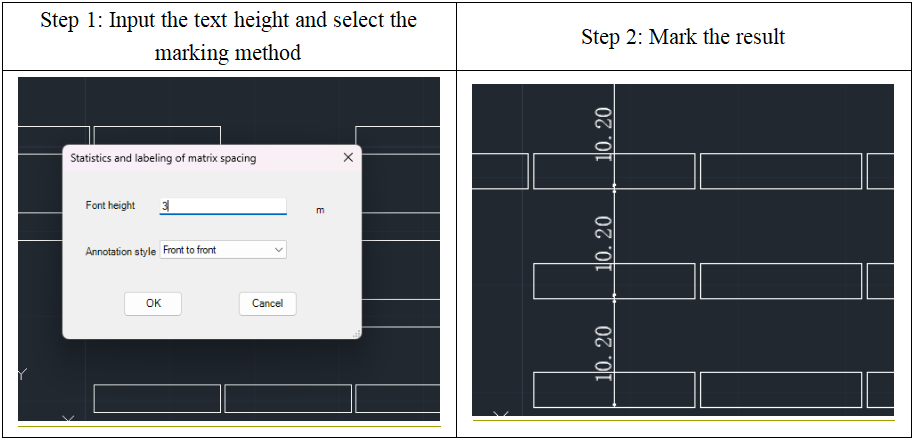
(9) MarkPitch command: This command is designed to achieve one-click marking of the spacing for the selected array. The marking options include three modes: "Front edge to front edge", "Back edge to back edge", and "Clear spacing". After execution, the software will automatically calculate and summarize the spacing of the selected array.
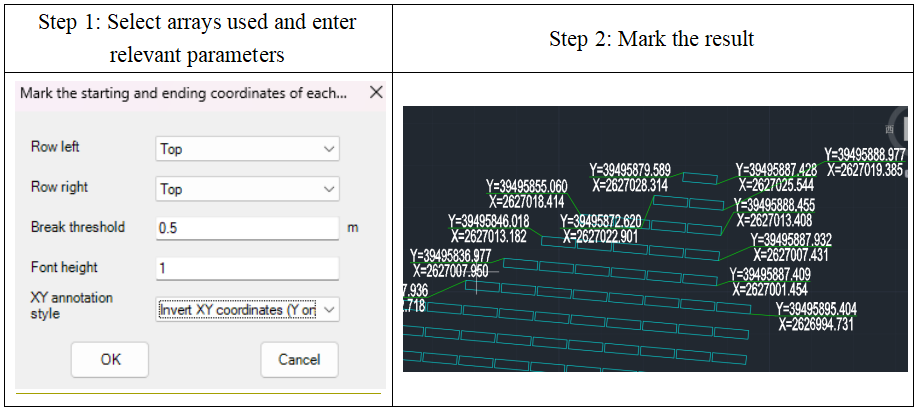
(10) MarkArrayCoordinate: This command is designed to mark the coordinates of the start array index and the end array index for each row. Users can independently set the position of the annotation and the height of the annotation text.
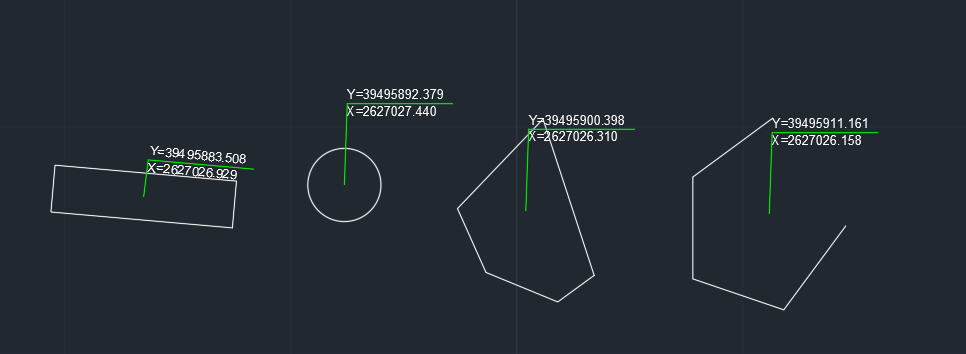
(11) DimEntityCenter: This command is designed to Mark the center coordinates of graphical elements. The objects that can be marked include Pcs, circles, polylines, etc., and there is no requirement for the objects to be closed. When executing this command, users can freely set the height and position of the marking text, as well as whether the XY axis coordinates need to be reversed.
(12) CalShadowRange: This command is designed to draw the shadow range of selected objects on the horizontal plane. After the user executes this command, a dialog box will appear, as shown below.
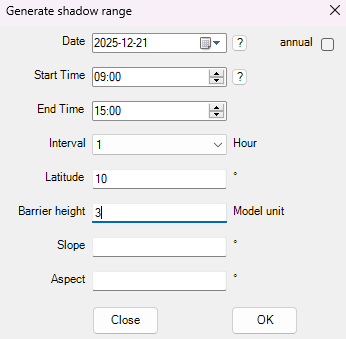
Users can specify the date and starting and ending time for which shading needs to be calculated (if "Whole year" is selected, shadow range lines for four specific dates, namely the vernal equinox, summer solstice, autumnal equinox, and winter solstice, will be generated). They can also set the calculation time interval themselves and enter the required longitude and latitude as well as the height of the shading object.
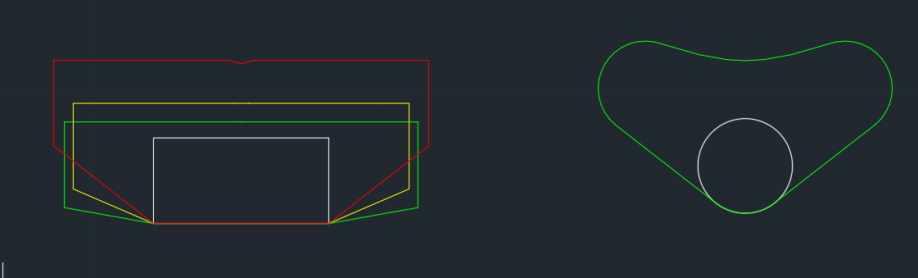
This command is typically used to calculate the shadow area of shading objects on the roof, as well as to perform preliminary batch calculations of the shadow area of wind turbines or towers within the photovoltaic plant area.
| 1. Plugin download link:https://pan.baidu.com/s/1FVuGkOGeUVTRj5-UDuiqTw?pwd=2si7 2. For the installation, uninstallation, and update of plugins, please refer to the video below: |
Article Comments(0)